

How I Built Prototypes with Design Tokens and Figma MCP
My AI-powered workflow: Figma MCP → Cursor → Production-ready UI.

We’re officially in the era where design systems can build apps not designers, not engineers, but the actual system itself.
And the trio that unlocked it for me is:
Design Tokens → Figma MCP → Cursor.
This workflow completely removed the “prototype first” mindset and replaced it with something faster:
Design → Prompt → Build → Test.
No static flows.No endless handoff meetings. And zero guesswork for how something should feel on mobile.
Let’s break down exactly how I do it.
1. Start With a Clean Figma File
Here’s what we are going to build today:

I prepared two screens (one default state & one end state).
Here’s the baseline checklist I follow:
Auto Layout everywhere
All colors, spacing, radii, typography = tokens
Real variants, not duplicates
Logical naming: Button / Primary / Large
No ghost frames
No random 17px text sizes that “felt right at the time”
Because whatever is in Figma… becomes your code.
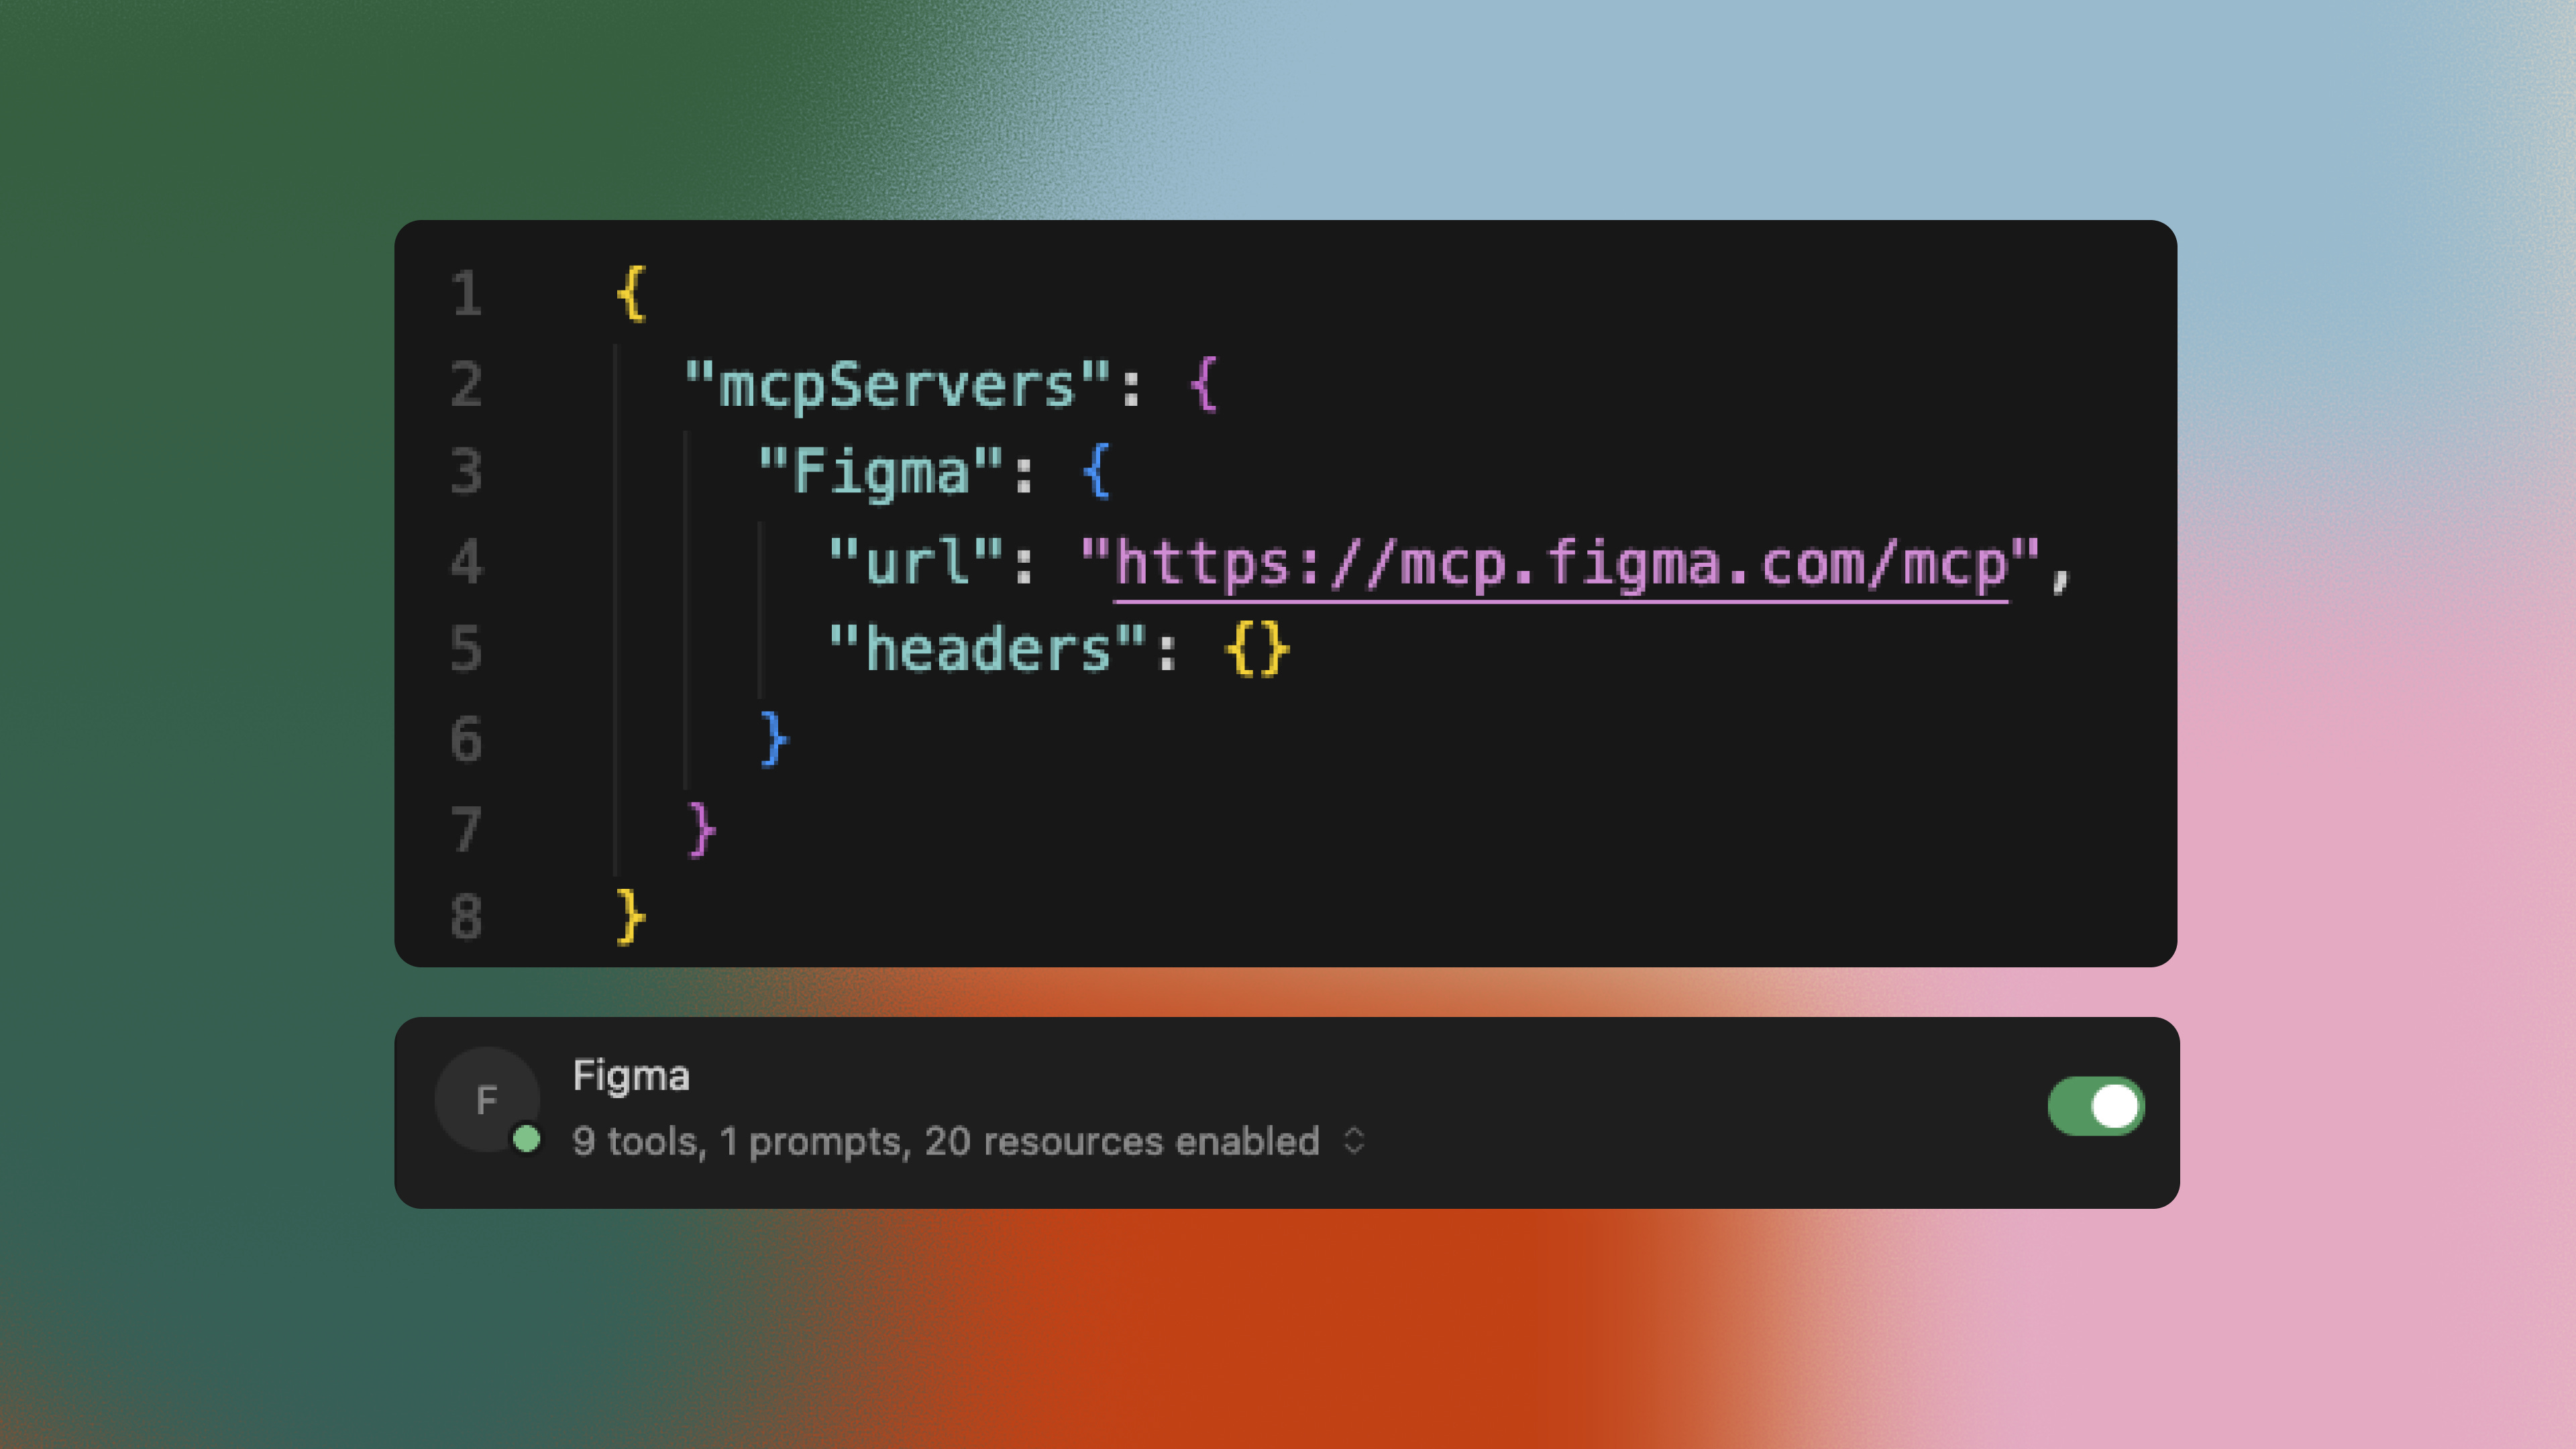
2. Activate Figma MCP (Your Design System Becomes an API)
This is where things get interesting.
Figma MCP turns your file into something AI tools can query:
Tokens
Components
Variants
Layer structure
Metadata
Cursor can literally ask Figma:
“Give me the real Button component with real spacing, real radius, and the Light/Dark tokens.”
It’s API-level access to your design system.
This is the moment your design file stops being “a handoff document” and starts becoming infrastructure.
3. Cursor Generates a Full Design System Folder
Before any UI is built, Cursor does something magical:
It creates a full folder like this:
design-system/
  tokens.json
Clean, typed, structured.
This is the part that feels like cheating:
Your design system is now real JSON.
Not manually written.
Not reinvented.
Generated straight from Figma through MCP.
And Cursor will reference these tokens for every screen you build.
That’s where Cursor Rules come in.
Create a new rule under .cursor/rules
# Theme Rules

You are building a React Native Expo app.

- Always use tokens from `design-system/tokens.json` for colors, spacing, radius, typography.
- Never hardcode hex colors or random spacing if a token exists.
4. Skip Prototyping — Go Straight to Building in Cursor
This is where the workflow becomes addictive.
Traditionally, you’d spend days:
mapping flows,
designing static screens,
prototyping interactions,
presenting it all,
revising,
re-presenting…
But with MCP + Cursor: the build IS the prototype.
You can actually feel the UI on mobile instead of imagining it.
For example:
In my recent speed run, I built:
Profile → QR Code navigation
Plus → Close animated button
5 mini icons fading in sequentially
Real touch interactions
True mobile motion
Zero manual code from me
Cursor built everything from my prompts + tokens
The results look and behave better than any Figma prototype because… they’re not prototypes.
They’re real mobile interactions.
5. The Prompt That Drives Everything
Because MCP exposes your design system, your prompts don’t need to be verbose. They just need to be structured.
Here’s my prompt:
